تمثل Avabet منصة متكاملة تجمع بين الجودة، الأمان، وسهولة الاستخدام في سوق الألعاب الإلكترونية المصري. في Avabet casino ستجد شروحات واضحة لكل لعبة، مما يجعل التجربة مناسبة للمبتدئين وأيضًا للمستخدمين ذوي الخبرة. تُعتبر Avabet منصة حديثة في عالم الألعاب الإلكترونية، حيث توفر للاعبين في مصر بيئة موثوقة تجمع بين الأمان والترفيه. يتم إلغاء التوزيعات بفضل استيراد المقرضين، وسكريل، ونيتلر، وستجدها أيضًا على Trustly. Continue reading
| Posted in:
قم بتسجيل الدخول إلى كازينو AvaBet 2026 واحصل على رمز مكافأة بدون الحاجة إلى إيداع.
تحظى الرهانات المستقبلية في دوري البيسبول الرئيسي، مثل الرهانات على الفائزين ببطولة العالم أو جوائز اللاعبين الفردية , مثل جائزة أفضل لاعب أو جائزة ساي يونغ,، بشعبية كبيرة بين المراهنين على المدى الطويل. كما يستمتع مراهنو دوري كرة السلة الأمريكي للمحترفين (NBA) بالرهانات المتعددة في نفس المباراة، وهي ميزة تقدمها معظم مواقع المراهنات الرياضية الرائدة مثل FanDuel وCaesars. Continue reading
May 18, 2026 | Posted in:
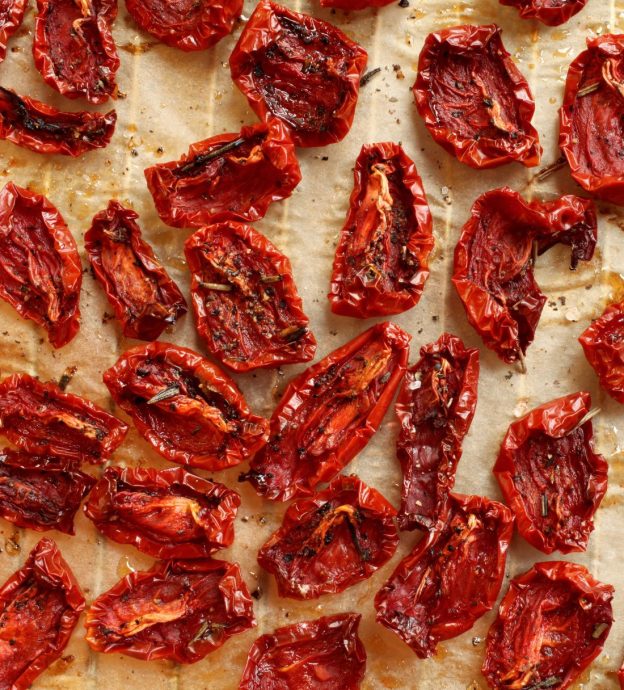
Sun-Dried Tomato Hummus
Published: May 2026
Author: Jaymie and Lily
Recipe origin: Middle East
Sesame-free hummus is nearly impossible to find, as tahini (a paste made from sesame seeds) is a common ingredient. This delicious recipe proves it isn’t necessary—the hummus is just as creamy and flavorful without it.
Naan bread or pita
¼ cup water
2 TBSP of oil packed sun-dried tomatoes (separate a few, chopped, for garnish)
½ tsp salt
¼ tsp ground pepper
2 garlic cloves
1 can (15 oz) chickpeas, drained (separate out a few for garnish)
Chopped fresh parsley, optional
Toast the naan bread or pita. Slice into triangles.
Combine water, sun-dried tomatoes, salt, pepper, garlic, and chickpeas in a food processor or blender. Process until smooth.
Garnish with chopped sun-dried tomatoes, a few chickpeas, and parsley.
Sesame-free hummus is nearly impossible to find, as tahini (a paste made from sesame seeds) is a common ingredient. This delicious recipe proves it isn’t necessary—the hummus is just as creamy and flavorful without it.
Ready to turn your recipes into something memorable? Click here to get started!
No comment |
Post a Comment
March 24, 2026 | Posted in:
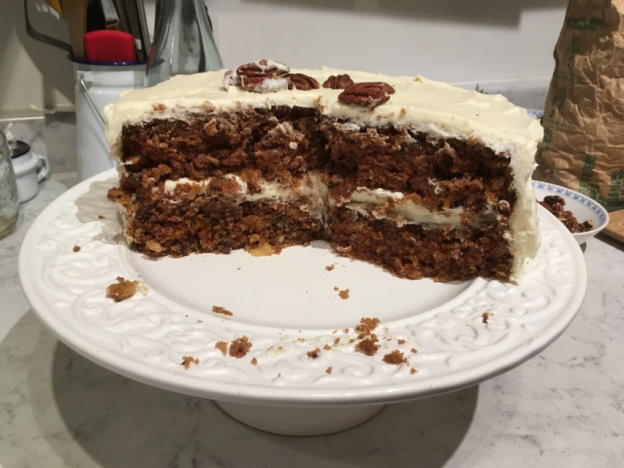
Lindsay’s Favorite Carrot Cake
Published: March 2026
Author: Lindsay @ Heritage Cookbook
Recipe origin: Canada
I came across this recipe 20 years ago at a tree planting camp where I was the baker (then cook) for four summers. In addition to shredded carrots it’s chock-full of warm spices, toasted pecans, and shredded coconut, all offset by a not-too-sweet cream cheese frosting that’s as essential to this cake as the carrots are.
FOR THE CAKE:
2 cups (240 grams) all purpose flour
2 teaspoons baking soda
1 teaspoon sea salt
2 teaspoons ground cinnamon
1 teaspoon ground ginger
½ teaspoon freshly grated nutmeg
2 cups (400 grams) granulated sugar
1¼ cups (225 grams) vegetable or canola oil
4 large eggs, at room temperature
3 cups (290 grams) shredded carrots (from about 4 large carrots)
1 cup (105 grams) chopped toasted pecans (chop them fairly finely to make cutting the finished cake easier)
1 cup (90 grams) unsweetened toasted coconut flakes (optional, also chopped up a bit to make cutting easier)
FOR THE CREAM CHEESE FROSTING:
16 ounces (450 grams) cream cheese, at room temperature (use two full bricks)
½ cup (113 grams) unsalted butter, at room temperature
2 cups (240 grams) confectioners’ sugar, sifted (start with slightly less, and taste as you go)
Splash of vanilla
Big pinch of salt
Extra toasted pecan halves, for decorating
Preheat oven to 350°F. Grease the sides and bottoms of two 10-inch round cake pans (or three 8-inch pans) with butter and press a circle of parchment into the bottom of each. [Using just 2 pans still makes a fairly tall cake.]
In a medium mixing bowl, whisk together flour, baking soda, salt, cinnamon, ginger, and nutmeg.
In a large mixing bowl, whisk together sugar and oil. Add eggs, one at a time, whisking until combined after each addition. Stir in flour mixture with a rubber spatula until there is just a bit of dry flour showing. Add shredded carrots, pecans, and coconut and stir until thoroughly combined and evenly distributed.
Divide batter equally between the prepared cake pans. Bake for 35-50 minutes, until a cake tester or toothpick inserted in the center of the cake comes out clean. Cool in the pans on a wire rack for 15 minutes, then carefully turn the cakes out onto the rack to cool completely.
To make the frosting: In the bowl of a stand mixer fitted with the paddle attachment, beat cream cheese and butter until smooth/slightly whipped. With the mixer on low speed, gradually add confectioners’ sugar. When all the powdered sugar has been added, turn the speed up to medium and beat until fluffy, about 1 minute. Scrape down the sides and bottom of the bowl and stir by hand a bit to make sure everything is fully incorporated.
When the cake layers have cooled, level the cakes with a serrated knife if necessary. Place one cake layer on a serving plate. Spread a thick layer of frosting on top of the cake with an offset spatula. Place the other cake layer on top of the frosting, flat side up. Spread a crumb coat of frosting on the top and sides of the cake with an offset spatula, then chill the cake in the refrigerator for 10-15 minutes.
Ice the cake with the remaining frosting. Allow the cake to chill for at least 30 minutes for the frosting to firm up a bit.
Ready to turn your recipes into something memorable? Click here to get started!
February 14, 2026 | Posted in:
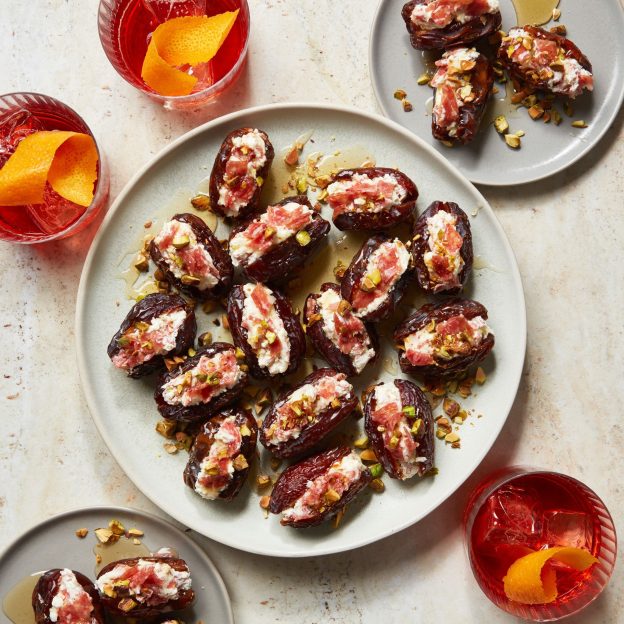
Easy 15-Minute Goat Cheese and Salami Stuffed Dates
Published: February 2026
Author: Sourced from Epicurious; Photo by Joseph De Leo, Food Styling by Micah Marie Morton
Recipe origin: USA
From Heritage Cookbook creator Kristin L.’s ‘Make Ahead Dinner Party’ menu!
Serves 8 / Total time: 15 minutes
Ingredients
3 tbsp. roasted & salted pistachios, chopped
4 oz. goat cheese
3 oz. thinly sliced Calabrese or other spicy salami, finely chopped
1 tsp. finely grated lemon zest
24 large dates (about 6 oz.), preferably Medjool, pitted
Hot honey (for drizzling)
Mix goat cheese, salami, and lemon zest in a medium bowl. Slice dates in half lengthwise, taking care not to cut all the way through, and open like a book. Stuff each date with a small scoop of goat cheese mixture.
Arrange dates, filling side up, on a large plate or platter. Drizzle honey over and top with pistachios.
Ready to turn your recipes into something memorable? Click here to get started!
| Posted in:
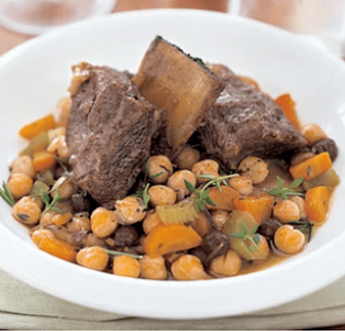
Braised Beef Short Ribs with Spicy Garbanzo Beans
Published: February 2026
Author: Kristin L.
Recipe origin: USA
From Heritage Cookbook creator Kristin L.’s ‘Make Ahead Dinner Party’ menu: This is my go-to dinner party meal! The house smells amazing when everyone arrives and all the work is already done and in the oven! Make sure to serve this with hot crunchy bread. A nice starter is a simple salad with Gorgonzola cheese and a simple vinaigrette. Round things off with something chocolate.
Serves 6 to 8 | 3 hours total (including cooking time)
Garbanzo Beans:
3 15-oz cans garbanzo beans drained and rinsed
1 tablespoon extra-virgin olive oil
1 medium onion, diced
2 celery stalk, diced
3 medium carrots, diced
4 large fresh rosemary sprigs
4 large fresh thyme sprigs
1 teaspoon salt
1/2 cup golden raisins
1 quart chicken stock
Short Ribs:
8 3- to 4-inch-long meaty short ribs
2 tablespoons vegetable oil
1 small onion, chopped
2 small carrots, chopped
2 celery stalks, chopped
5 large fresh thyme sprigs
3 garlic cloves, peeled
3 cups low-salt chicken broth
1/2 cup sherry vinegar
2 fresh tarragon sprigs
1 cup sliced hot cherry peppers, drained (from a jar)
Preheat oven to 350°F. Sprinkle short ribs on all sides with salt and pepper. Heat oil in heavy large wide ovenproof pot over medium-high heat. Add short ribs in single layer and brown on all sides, about 12 minutes. Transfer ribs to plate. Add onion, carrots, celery, 2 thyme sprigs, and garlic to pot. Sauté until vegetables brown, about 10 minutes. Return ribs to pot in single layer, meat side down. Add broth, vinegar, tarragon sprigs, and 3 thyme sprigs and bring to simmer (broth will not cover ribs). Bake uncovered until ribs are tender, about 1 hour 45 minutes.
While the ribs cook, make your beans. Heat oil in a large pan over medium-high heat. Add onion, celery, and carrots; sauté until vegetables begin to brown, about 10 minutes. Add rosemary and thyme. Add beans to pan and broth and bring to boil. Reduce heat to medium-low and add raisins. Let simmer for about 30 minutes. Reduce to low and keep warm.
Using oven mitts, transfer short ribs to stove top. Tilt pot; spoon off fat from surface. Drain bean-raisin mixture. Add cherry peppers and drained bean-raisin mixture to the ribs in the pot. Simmer until sauce thickens slightly, about 15 minutes. Season with salt and pepper. Transfer to bowls to serve.
Ready to turn your recipes into something memorable? Click here to get started!
September 12, 2025 | Posted in:
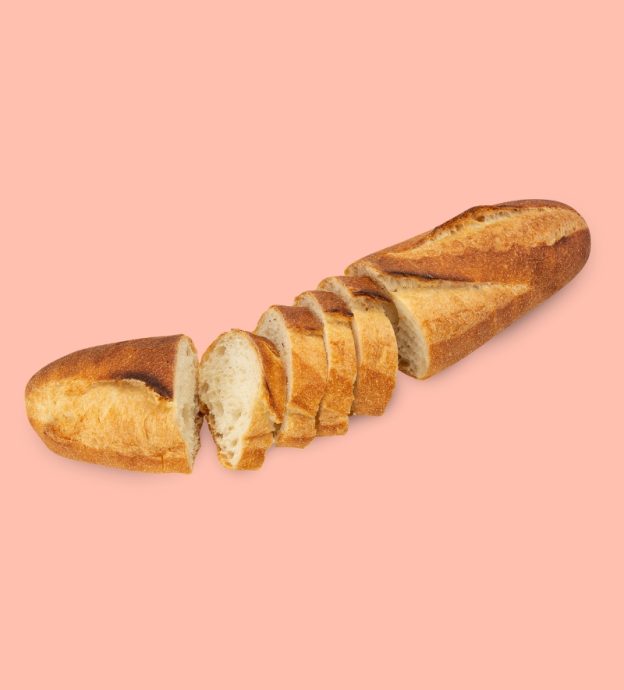
Governor’s French Bread
Published on: September 11th/2025
Author: Suzana Oliveira & June Reeder McCarthy
Recipe origin: France
This is a Frannie Packard recipe, Executive Chef at the Governor’s Residence before me. Billy Graham told Frannie that it was the best bread he had ever eaten. My family now considers it the ‘Canada French Bread’.
2 cups warm water, 100-115 degrees
1 package active dry yeast
1 tablespoon sugar
1 tablespoon coarse salt
3 1/2 – 4 cups bread flour
1. Place the water, yeast, and sugar in the bowl of an electric mixer fitted with the beater bar. Allow the yeast to proof (dissolve) about 5 minutes. With the mixer on low speed, gradually add salt and 3 cups flour. When the flour is incorporated, turn the mixer up to medium-high and beat for about 2 minutes. Reduce speed to low and slowly add about 1 1/2 cups flour, 1/2 cup at a time, until the dough wraps around the beater and cleans the sides of the bowl. You may not use all the flour. The worst thing you can do to bread dough is to add too much flour.
2. Scrape the dough off the beater bar and leave the rough mass of dough in the mixing bowl. Cover with plastic wrap and a towel. Allow the dough to rise in a warm, draft-free place until doubled in size, about 1 1/2 hours. Turn dough over itself in the bowl about 4 times. Cover, and allow to rise another 45 minutes.
3. Preheat the oven to 425 degrees. Place the dough on a lightly floured board, cut dough in thirds or half depending on your loaf pan. Roll into French loaf form. Place the dough onto a greased French loaf pan. Allow to rise with a covered towel. When the dough has doubled, make 3 slashes in each loaf with a sharp knife. Bake for 25 minutes or until a thermometer reads an internal temperature of 200 degrees. Remove from the pan immediately to cool.
Whole Wheat Variation
2 1/2 cups water for the 2 cups water
2 cups all-purpose flour & 4 cups whole wheat flour for the 3 1/2 cups bread flour
Method remains the same.
Ready to turn your recipes into something memorable? Click here to get started!
May 29, 2025 | Posted in:
Thanks for Entering the Giveaway!
You’re now entered to win a copy of “My Cypriot Table” by Irene Matys!
Want to double your chances of winning? Follow us on Facebook and Instagram and you’ll be entered again. (If you already follow us, you’re entered twice automatically!)
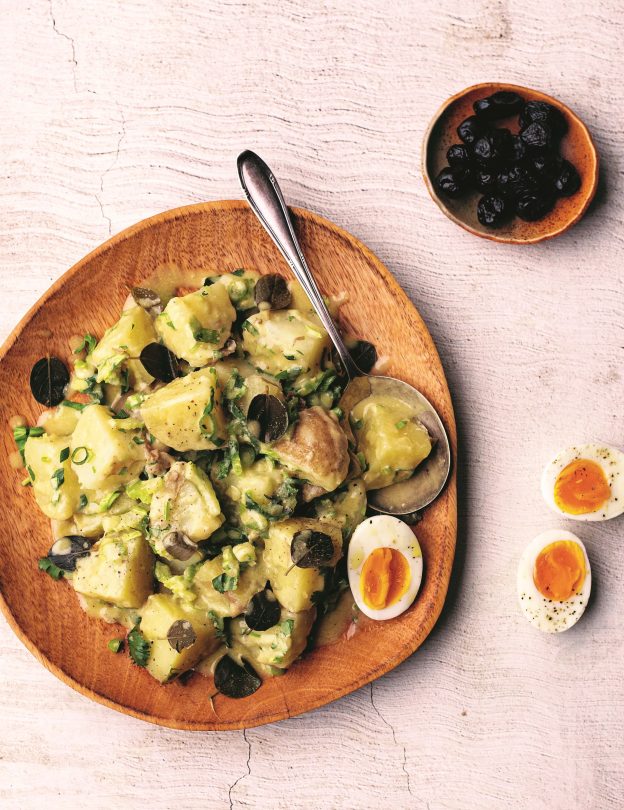
The contest is open until Wednesday, June 5th, and the winner will be notified by email by Friday, June 7th. In the meantime, Irene has a gift for everyone who enters — her recipe for Warm Potato Salad with Tahini Vinaigrette:
Warm Potato Salad with Tahini Vinaigrette
“There’s nothing like a classic potato salad, but this version elevates it with a twist of Cypriot flavors. The slightly nutty tahini pairs beautifully with the tart lemon and gives it a delicious creamy flavor. This salad pairs wonderfully with any grilled meats, fish, or seafood but I also love it as a meal on its own. It’s just as delicious served cold and taken to a beach or park picnic.”
Salad:
1½ lb (670 g) yellow potatoes, skin on, scrubbed
½ tsp sea salt 4 large eggs
½ cup thinly sliced celery with leaves
⅓ cup finely chop fresh flat-leaf parsley
¼ cup thinly sliced red onions
⅓ cup sun-dried black olives or Kalamata olives, pitted
Lemony Tahini Vinaigrette:
⅓ cup + 1 Tbsp extra-virgin olive oil
3 Tbsp fresh lemon juice 2 Tbsp tahini
1 tsp Dijon mustard
1½ Tbsp pickled capers, drained from their brine
1 tsp sea salt
¼ tsp fresh ground pepper
To make the salad, place the potatoes in a large pot, cover with water, and add the salt. Bring to a boil, then reduce heat to a medium boil. Cook for 20 to 25 minutes or until fork-tender. Drain the potatoes, reserving 3 Tbsp of their water. Cut the potatoes into equal bite-size pieces. Place in a large bowl and toss with the reserved cooking water.
Fill another medium pot with enough water to cover the eggs and bring to a boil. Add the eggs and bring up to a rolling boil for 7 minutes. Drain and put them in an ice bath to cool. Once cool, peel and slice in half lengthwise.
While the potatoes and eggs are cooking, prepare the vinaigrette by whisking the olive oil, lemon juice, tahini, mustard, capers, salt, and pepper in a bowl.
Add the celery, parsley, and onions to the potato salad and toss with the vinaigrette. Serve immediately with the eggs and olives.
May 13, 2025 | Posted in:
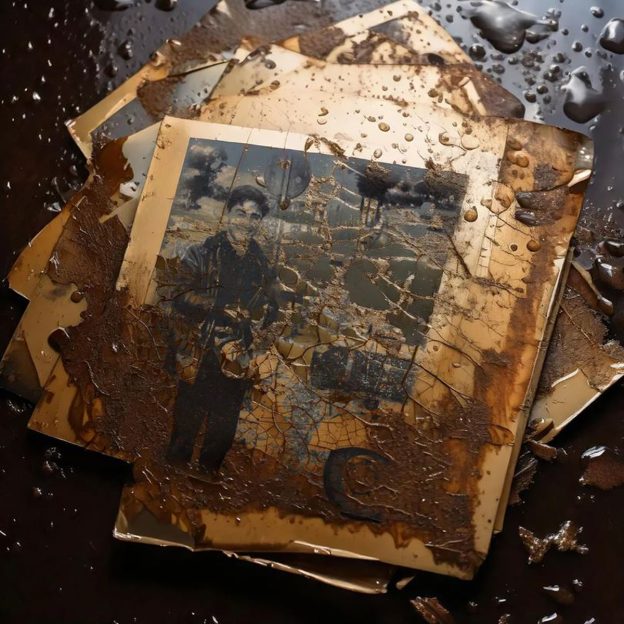
Photo Preservation Tips From a Professional Archivist
Wondering how to preserve old family photos? Proper photo storage, careful handling, and good recordkeeping can help protect your family’s photographic history for future generations. Professional archivist Sam Rintoul shares six practical dos and don’ts for preserving printed photographs and family archives at home.
Six Expert Tips for Preserving Your Family Photos
Sam Rintoul, professional archivist and founder of Mnemosyne Digital, shares her top six do’s and don’ts when it comes to working with and storing your old family photos!
Do: Keep Brief Records
Take the minute to write the relevant information on the back of the photograph or to add the metadata in the details section of your digital photograph. This does not have to be extensive—keep it short, sweet and to the point. You may know the who, what, when, where and why right now, but what about in 30–50 years? Think about those details for the person who will be inheriting your collection and wishing they knew the names or locations. Future-you will be grateful that past-you took those few moments to jot anything down to provide context and jog those memories.
Do: Check the Quality of Your Storage Materials
Whether you scrapbook, use photograph albums, or store all your photographs in envelopes or boxes, materials matter. Unless the materials are archival quality, the paper used to print, attach or contain the photographs typically contains properties such as lignin, which leads to acidity over time.
Take a piece of paper and tear a piece off anywhere. Those tiny and frayed fibrous edges that you just created? Regardless of what the material was that created the paper, the cellulose in those fibers is what is going to eventually break down into what is known as lignin, which is acidic. Think of newspaper clippings that yellowed with age or became extremely brittle. When you find archival-quality materials that say “lignin free” and “buffered,” it means that the lignin has already been removed and that a protective layer has been added to reduce the pH, reducing the potential for acidity.
Do: Think About How You Handle Photographs
All photographs have emulsion layers. Essentially, an emulsion layer is a thin, light-sensitive layer that captures an image when exposed to light.
If we touch the face of a photograph, the natural oils and salts in our skin can leave residue behind as shiny spots and smudges or cause reactions with the emulsion layer or the backing, which can lead to discoloration, fading and degradation.
Many of you may have older photographs—perhaps even tintypes or daguerreotypes. These have a fragility to them and chemical compositions that modern photographs do not possess.
When handling photographs, regardless of age, if you do not have gloves handy, try to hold them only by the edges or let them rest flat on your hand. If you do wear gloves, nitrile (or similar) gloves are the best choice for photographs. Cotton gloves can impede movement, catch on edges, and transfer loose fibers and dust to the photographs. If you know you will be handling photographs with your bare hands, washing your hands thoroughly beforehand will help remove excess oil.
Don’t: Underestimate Temperature
Do not underestimate the role temperature can play in wreaking havoc on your photograph collection. Take a moment to think about how and where you store your photograph collection.
Many times, photographs are kept in uninsulated attics, basements or storage units where they experience constant swings between extreme temperatures year after year. Heat causes materials to expand, while cold causes them to contract, affecting them on a molecular level. Depending on your climate (and factors such as moisture), this can lead to warping, brittleness, mold and other forms of damage. Keeping photographs in an insulated, temperature-controlled environment provides the greatest long-term stability for your collection.
Don’t: Treat Your Photographs Like Office Supplies
Talk to any archivist and the bane of their existence is photographs and documents that have been taped, stapled, paper-clipped, pinned, stickied, glued, rubber-banded, written on, laminated or otherwise decorated.
Many of these materials eventually cause damage. Metals can rust, affecting the photograph’s emulsion, while tapes and glues are often acidic and leave behind residue when removed.
If scrapbooking is your jam, more power to you! A simple suggestion is to invest in two copies of the photographs you plan to use. That way, one copy remains untouched for long-term preservation while the other can become part of your creative project.
Don’t: Store Photographs on the Ground
Unfortunately, storing boxes of photographs directly on the ground is an all-too-common occurrence.
Long-term moisture absorption, insects, dust and rodents can all damage a collection, but the greatest threat is flooding. Whether caused by a natural disaster or a sprinkler system, standing water can ruin a photographic collection in a very short amount of time. Even storing your collection on a low shelf provides significantly better protection than leaving it on the floor.
Conclusion
Above all, do not forget to have fun and be in the moment. Collecting and preserving family, chosen-family and friends’ memories should be an enjoyable experience.
When it comes to preservation, something is always better than nothing. Any step forward—no matter how small—is still a step in the right direction. So have fun and go preserve some photographs! Just remember: preserving your photographs today is far more cost-effective than conservation and restoration work will be in the future.
Frequently Asked Questions About Preserving Family Photos
What’s the best way to store old family photographs?
The best way to preserve old photographs is to store them in archival-quality, lignin-free, buffered materials in a cool, dry, temperature-controlled environment. Avoid attics, basements and areas with frequent temperature fluctuations.
Should you write on the back of old photographs?
Yes. Recording names, dates, locations and other important details helps preserve the history behind your photographs. Future generations will appreciate having this information, whether it is written on the back of a printed photo or stored as metadata in a digital image.
How should you handle old photographs?
Handle photographs by their edges whenever possible. Clean hands are usually sufficient, although nitrile gloves are recommended for especially delicate or historic photographs.
More About Sam
“My path to becoming an archivist began back in 2011 when I volunteered in the Archives at my local community college for a research project and I was hooked. I have always loved history but for me, it is the personal touches and imagining the life connected to that item that drew me in and fed the love. When standing in the Archives, instead of just reading about history on the pages of books, I could touch pieces of history and be a part of continuing the story.
Volunteering at my community college turned into Independent Study classes and work-study opportunities in the Archives and independent contractor work on grant projects at the local museum as an undergraduate student. Finally, after completing my Master’s degree in Archival and Records Administration, I began my own digital archiving business two years ago.
This journey has not been without significant challenges, and I would not be where I am today without the love and support of my partner (who, incidentally, was the other volunteer on that research project in the community college archives). It is because of those challenges that I have come as far as I have today and it is in working with my clients, learning who they are, and essentially touching their memories while I digitize their life stories, that I play a small part in preserving the past for the future.”
Looking for a meaningful way to preserve those family memories? Once your photographs have been digitized and organized, they can become the perfect addition to a custom family cookbook. Create your family cookbook today.
January 15, 2025 | Posted in:

Expert Tips for Organizing Your Family Cookbook Project
Looking for tips on how to organize a family cookbook project? Creating a family cookbook is one of the best ways to preserve treasured recipes, family stories, and traditions for future generations. Food editor Sara Levine Rosenblum shares six expert tips to help you collect recipes, organize contributors, and create a beautiful custom cookbook your family will treasure.
Is this the year you will finally make that family cookbook you’ve been thinking about for years (or decades)?
We’re sharing some expert guidance on how to get organized and make it happen in 2025 from Sara Levine Rosenblum of SLR Creative. Sara is a food editor who specializes in helping families, businesses and organizations bring their recipes to life in custom cookbooks.
The first cookbook I created was a celebration of my beloved Grandma Florence’s recipes after she passed away in 2009. Grandma Florence inspired the lifelong love of food and cooking that led me down a path to food writing, culinary school, Food Network and eventually, launching my own business focused on cookbooks!
As you can imagine, I’ve learned a great deal since I published that scrappy little book (at Kinkos!) fifteen years ago, but it still means so much to me and my family.
If you’ve always wanted to celebrate and preserve your recipes in a family cookbook, here are my top six tips to get you started.
1. Give the gift of time.
Want to gift a family cookbook next Christmas? Start now! Spread the word and give everyone (yourself included) plenty of time to gather their recipes.
2. Get creative with collecting.
Use email and Google Drive folders to gather recipes and photos easily, but don’t forget older relatives who might prefer a phone call. Grandma’s secret recipe might need to be dictated — or better yet, cook it together and document the steps with pictures!
3. Capture the stories.
Great cookbooks capture memories, not just recipes. When you’ve got relatives on the phone, hit that record button! Jot down personal anecdotes and include them in short headnotes that bring each dish to life.
4. Make it a team effort.
My mom was my co-editor on Grandma Florence’s cookbook and it was a true bonding experience for us to tackle the project together. Collaborate with siblings, cousins, or parents to create something truly special. Turn that family group chat into a brainstorming session and gift a cookbook everyone will treasure.
5. Snap and scan.
Take simple photos of dishes at family gatherings—perfect contribution for that amateur photographer on your family “cookbook committee”! Daylight is your best friend for great food photos. Include scans of old recipe cards—the more well-loved, the better—for a nostalgic touch.
6. Don’t be intimidated.
Platforms like Heritage Cookbook make it seamless to organize, design and print your book. I wish I’d known about Heritage when I was pulling my hair out designing and laying out pages manually for my first Kinkos print job!
Frequently Asked Questions About Creating a Family Cookbook
How do you organize a family cookbook?
Start by giving family members plenty of time to contribute recipes, photos, and stories. Organize everything in shared folders or by email, and consider asking relatives to help collect recipes or interview older family members. Breaking the project into smaller tasks makes creating a family cookbook much more manageable.
What should a family cookbook include?
In addition to recipes, many family cookbooks include photographs, handwritten recipe cards, personal stories, cooking tips, and memories connected to each dish. These details help turn a recipe collection into a treasured family keepsake.
What’s the easiest way to make a custom cookbook?
Online cookbook makers like Heritage Cookbook simplify the process by helping you organize recipes, customize layouts, collaborate with family members, and professionally print your finished cookbook.
January 15, 2025
Ready to turn your recipes into something memorable? Create your family cookbook today.