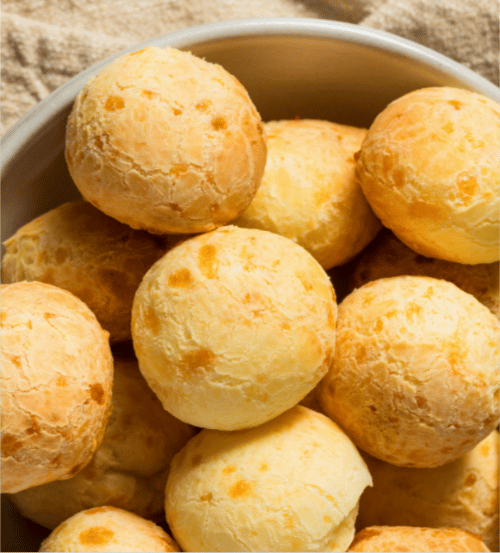
A bowl of round cheese buns from Brazil

Pão de Queijo (Brazilian Cheese Bread)

Published: August 2026
Author: Olivia R.
Recipe origin: Brazil

“Pão de queijo is a traditional Brazilian recipe that is easy to make with kids and is loved by everyone. We love to make it for our family or bring to parties. You can eat as a snack, side dish, breakfast, or lunch. It’s a comfort snack that is good in any season.”

Yield: 26-30 cheese balls
1½ cup freshly grated fresh Gruyere or cheddar cheese
1 cup full fat milk
¼ cup vegetable oil
2 eggs
3 cups of tapioca flour
2 teaspoon salt
1 teaspoon garlic powder (optional)

1. Preheat oven to 350 degrees.

2. Combine tapioca flour and salt in a large bowl, set aside.

3. In a medium bowl combine cheese and eggs and set aside.

4. Add milk and oil to a small saucepan and bring to a simmer over medium heat on stove top.

5. After simmering, remove pan from heat and slowly pour the hot liquid into tapioca flour, stirring with a wooden spoon to combine. The mixture will be gummy and clumpy. Wait to 3-5 minutes to cool down.

6. Add cheese and eggs. Use a wooden spoon or your clean hands to combine until you have a homogeneous mixture.

7. Pour the mixture into a mini muffin pan.

8. Bake for 30-35 minutes until lightly golden.

9. Enjoy it!

Ready to turn your recipes into something memorable? Click here to get started!

Vegetarian Camp Chili

Published: July 2026
Author: Degerlund Family
Recipe origin: Alaska

An easy-to-make vegetarian chili that’s great for a crowd while camping. Don’t forget the can opener!

Seasoning Mix:
4 Tbls chili Powder
1 tsp garlic powder
1 Tbls mustard powder
½ Tbls sugar
1 tsp oregano
1 tsp cumin

Chili Bean mix:
1 can black beans (15oz)
1 can white beans (15oz)
1 can garbonzo beans (15oz)
1 can kidney beans (15oz)
1 can red beans (15oz)
1 can sweet corn (15oz)
1 can tomato paste (8oz)
1 can tomato sauce (15oz)
1 can diced tomatoes (32 oz)
Salt & pepper

At home, add seasoning mix ingredients and store in an airtight container.

Out camping: Add all beans, corn, tomatoes and seasoning mix in one pot. Heat slowly over coals, stirring often, until boiling (about 20 minutes). Season to taste with salt and pepper.

Serve with cheese, sour cream, and Fritos.

Ready to turn your recipes into something memorable? Click here to get started!

‘Chocolate Covered Strawberries’ With Shortbread

Published: July 2026
Author: Degerlund Family
Recipe origin: Alaska

A clever (and easy to carry) take on chocolate covered strawberries; great for a backpacking trip.

½ cup freeze dried strawberries
1 Tbls hot cocoa mix
2 Shortbread cookies

At home: Put dried strawberries and hot cocoa mix in a small resealable bag. Put shortbread cookies in a separate bag.

Out adventuring: Boil some water. Add a few Tablespoons of boiling water to chocolate and strawberries, let sit 1-2 minutes until strawberries are softened.

Crumble shortbread cookies over top of the chocolate covered strawberries, enjoy right out of the bag.

Ready to turn your recipes into something memorable? Click here to get started!

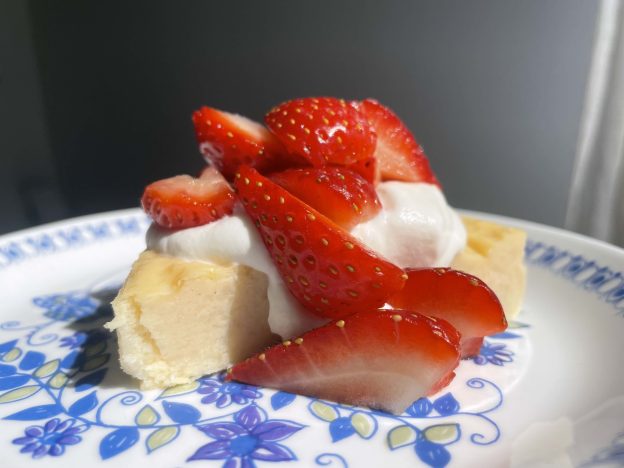
A slice of Swedish cheesecake topped with strawberries

Ostkaka (Swedish Cheesecake)

Published: June 2026
Author: Dora Lundell
Recipe origin: Sweden

Hailing from Sweden, this not-too-sweet ‘cheesecake’ is made with cottage cheese and is an excellent vehicle for strawberries and cream.

3 cup cottage cheese (large curd)
¾ cup flour
4 egg (well beaten)
1 cup cream
½ cup sugar
1 tsp vanilla
10 cardamom seeds (crushed)
Add salt to your own liking
Optional: strawberries and whipped cream for topping

Wash cheese very well and let drain dry.
Mix flour and cheese with a fork.
Add well-beaten eggs, cream, sugar, vanilla, cardamom, and salt.
Bake slowly in 300–350°F oven for 1 hour.
Place pan in a pan of water while baking.

Ready to turn your recipes into something memorable? Click here to get started!

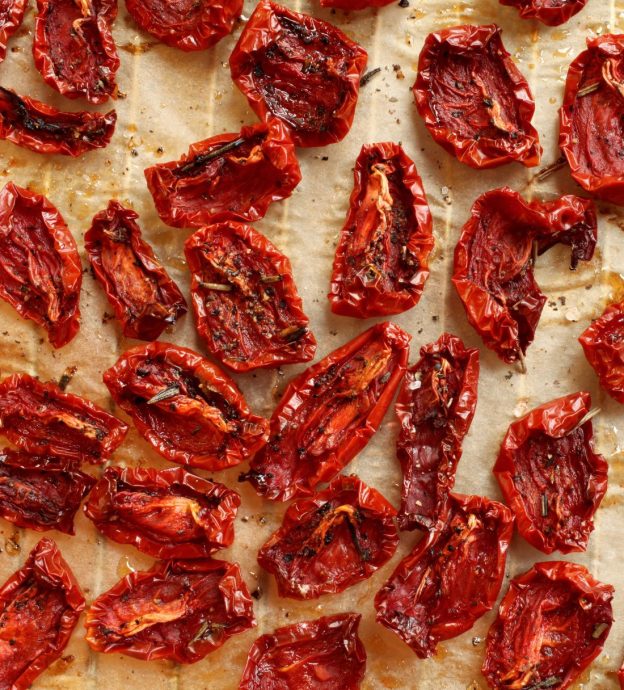
Overhead image of sun-dried tomatoes on parchment

Sun-Dried Tomato Hummus

Published: May 2026
Author: Jaymie and Lily
Recipe origin: Middle East

Sesame-free hummus is nearly impossible to find, as tahini (a paste made from sesame seeds) is a common ingredient. This delicious recipe proves it isn’t necessary—the hummus is just as creamy and flavorful without it.

Naan bread or pita
¼ cup water
2 TBSP of oil packed sun-dried tomatoes (separate a few, chopped, for garnish)
½ tsp salt
¼ tsp ground pepper
2 garlic cloves
1 can (15 oz) chickpeas, drained (separate out a few for garnish)
Chopped fresh parsley, optional

Toast the naan bread or pita. Slice into triangles.
Combine water, sun-dried tomatoes, salt, pepper, garlic, and chickpeas in a food processor or blender. Process until smooth.
Garnish with chopped sun-dried tomatoes, a few chickpeas, and parsley.

Sesame-free hummus is nearly impossible to find, as tahini (a paste made from sesame seeds) is a common ingredient. This delicious recipe proves it isn’t necessary—the hummus is just as creamy and flavorful without it.

Ready to turn your recipes into something memorable? Click here to get started!

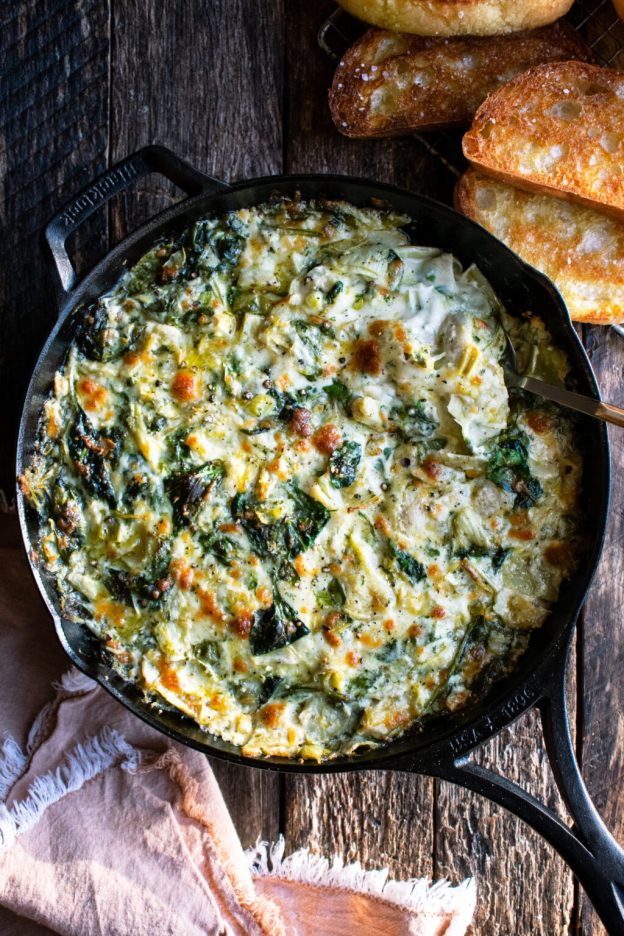
Egg-Free Spinach Artichoke Dip with Feta

Published: May 2026
Author: Jaymie and Lily
Recipe origin: Mediterranean

For those allergic to eggs who can’t use mayonnaise, spinach artichoke dip can be tricky. This recipe is a great substitute for traditional spinach artichoke dip, especially if you like feta!

14 oz can of artichokes, chopped
1 TBSP olive oil
½ tsp garlic powder
¼ tsp salt
¼ tsp black pepper
8 oz of feta, roughly chopped or crumbled
6 oz fresh spinach, chopped
1 cup parmesan cheese, grated
½ cup Greek yogurt
1-2 scallions, chopped

Preheat oven to 400 degrees.
In a small baking dish mix together the artichokes, olive oil, garlic powder, salt, pepper, and feta.
Bake for 20 minutes.
Mix everything together and then add the spinach, parmesan, greek yogurt, and scallions.
Mix again so everything is combined.
Bake for another 10 minutes.
Serve with your favorite crackers, veggies, chips, or crusty bread!

For those allergic to egg and can not use mayonnaise, spinach artichoke dip can be tricky. This recipe is a great substitute for traditional spinach artichoke dip, especially if you like Feta!

Ready to turn your recipes into something memorable? Click here to get started!

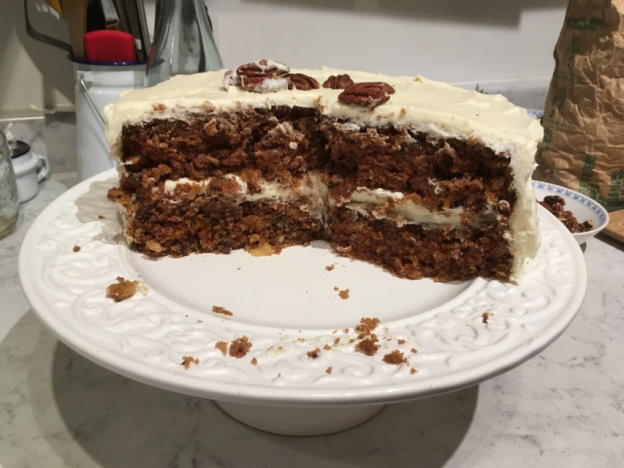
Lindsay’s Favorite Carrot Cake

Published: March 2026
Author: Lindsay @ Heritage Cookbook
Recipe origin: Canada

I came across this recipe 20 years ago at a tree planting camp where I was the baker (then cook) for four summers. In addition to shredded carrots it’s chock-full of warm spices, toasted pecans, and shredded coconut, all offset by a not-too-sweet cream cheese frosting that’s as essential to this cake as the carrots are.

FOR THE CAKE:
2 cups (240 grams) all purpose flour
2 teaspoons baking soda
1 teaspoon sea salt
2 teaspoons ground cinnamon
1 teaspoon ground ginger
½ teaspoon freshly grated nutmeg
2 cups (400 grams) granulated sugar
1¼ cups (225 grams) vegetable or canola oil
4 large eggs, at room temperature
3 cups (290 grams) shredded carrots (from about 4 large carrots)
1 cup (105 grams) chopped toasted pecans (chop them fairly finely to make cutting the finished cake easier)
1 cup (90 grams) unsweetened toasted coconut flakes (optional, also chopped up a bit to make cutting easier)

FOR THE CREAM CHEESE FROSTING:
16 ounces (450 grams) cream cheese, at room temperature (use two full bricks)
½ cup (113 grams) unsalted butter, at room temperature
2 cups (240 grams) confectioners’ sugar, sifted (start with slightly less, and taste as you go)
Splash of vanilla
Big pinch of salt
Extra toasted pecan halves, for decorating

Preheat oven to 350°F. Grease the sides and bottoms of two 10-inch round cake pans (or three 8-inch pans) with butter and press a circle of parchment into the bottom of each. [Using just 2 pans still makes a fairly tall cake.]
In a medium mixing bowl, whisk together flour, baking soda, salt, cinnamon, ginger, and nutmeg.
In a large mixing bowl, whisk together sugar and oil. Add eggs, one at a time, whisking until combined after each addition. Stir in flour mixture with a rubber spatula until there is just a bit of dry flour showing. Add shredded carrots, pecans, and coconut and stir until thoroughly combined and evenly distributed.
Divide batter equally between the prepared cake pans. Bake for 35-50 minutes, until a cake tester or toothpick inserted in the center of the cake comes out clean. Cool in the pans on a wire rack for 15 minutes, then carefully turn the cakes out onto the rack to cool completely.
To make the frosting: In the bowl of a stand mixer fitted with the paddle attachment, beat cream cheese and butter until smooth/slightly whipped. With the mixer on low speed, gradually add confectioners’ sugar. When all the powdered sugar has been added, turn the speed up to medium and beat until fluffy, about 1 minute. Scrape down the sides and bottom of the bowl and stir by hand a bit to make sure everything is fully incorporated.
When the cake layers have cooled, level the cakes with a serrated knife if necessary. Place one cake layer on a serving plate. Spread a thick layer of frosting on top of the cake with an offset spatula. Place the other cake layer on top of the frosting, flat side up. Spread a crumb coat of frosting on the top and sides of the cake with an offset spatula, then chill the cake in the refrigerator for 10-15 minutes.
Ice the cake with the remaining frosting. Allow the cake to chill for at least 30 minutes for the frosting to firm up a bit.

Ready to turn your recipes into something memorable? Click here to get started!

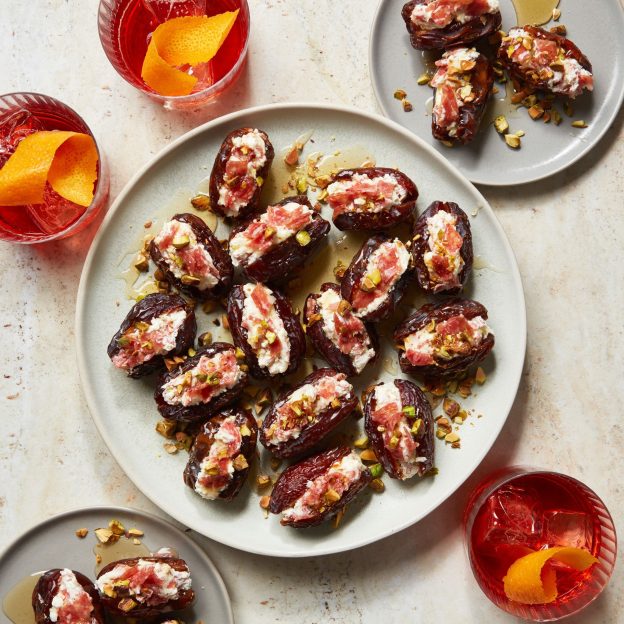
Easy 15-Minute Goat Cheese and Salami Stuffed Dates

Published: February 2026
Author: Sourced from Epicurious; Photo by Joseph De Leo, Food Styling by Micah Marie Morton
Recipe origin: USA

From Heritage Cookbook creator Kristin L.’s ‘Make Ahead Dinner Party’ menu!

Serves 8 / Total time: 15 minutes
Ingredients
3 tbsp. roasted & salted pistachios, chopped
4 oz. goat cheese
3 oz. thinly sliced Calabrese or other spicy salami, finely chopped
1 tsp. finely grated lemon zest
24 large dates (about 6 oz.), preferably Medjool, pitted
Hot honey (for drizzling)

Mix goat cheese, salami, and lemon zest in a medium bowl. Slice dates in half lengthwise, taking care not to cut all the way through, and open like a book. Stuff each date with a small scoop of goat cheese mixture.
Arrange dates, filling side up, on a large plate or platter. Drizzle honey over and top with pistachios.

Ready to turn your recipes into something memorable? Click here to get started!

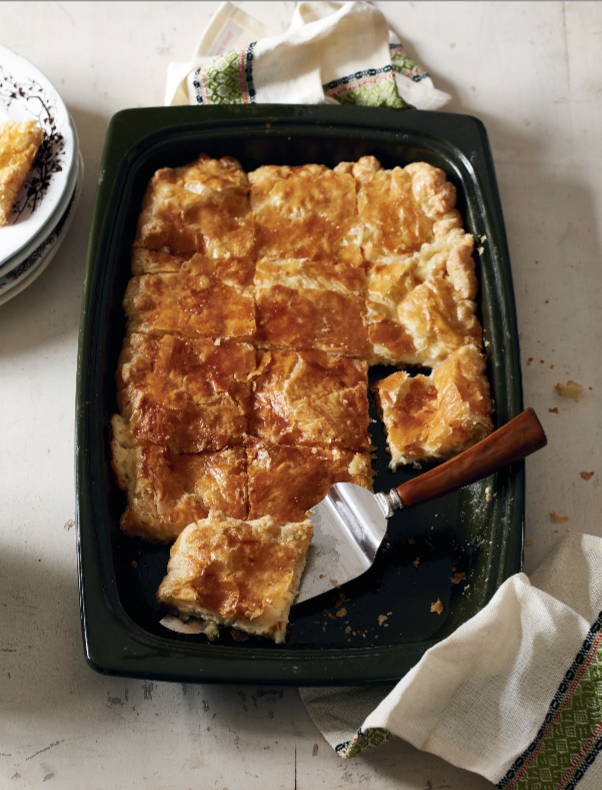
Penovani Khachapuri

Published on: November 7th/2025
Author: Polina Chesnakova
Recipe origin: Georgia

GEORGIAN FLAKY CHEESE BREAD
“This sheet-pan version of penovani khachapuri — usually sold as a compact, hand-held street food — is made with shatteringly crisp puff pastry and is nonnegoatiable at our big family parties. As the platter hits the table, a bit of a flurry ensues over who gets the corners (or, as we call them, popuchki—”little butts”). Thankfully there’s always enough pieces to go around, corner or no corner, and eventually everyone gets their fill. It’s impossible to get tired of this khachapuri, so don’t be surprised if it becomes a staple in your family, too.”

Unsalted butter, for greasing
All-purpose flour, for dusting
One (17.3-ounce / 490 g) box frozen puff pastry, thawed but chilled
1 pound (450 g) low-moisture whole-milk mozzarella cheese, shredded
5 ounces (140 g) feta cheese, grated
5 ounces (140 g) whole-milk ricotta cheese
1 egg, lightly beaten with a pinch of kosher salt

SERVES 8 TO 10
Preheat the oven to 375°F (190°C).
Lightly grease a 10×15-inch (25×38 cm) jelly-roll pan or an 11×17-inch (28×43 cm) glass baking dish, or something similar in size. These sizes will give you the best pastry-to-cheese ratio.
On a lightly floured surface, roll out one puff pastry sheet slightly larger than the size of your pan and transfer it to the pan. Sprinkle the mozzarella in an even layer over the dough, leaving a thin border all around. Evenly crumble the feta cheese over the top. Dollop the ricotta in small spoonfuls all over in an even layer.
Roll out the second piece of dough to the size of your pan and lay it over the cheese. Pinch the edges of the pastry layers together to tightly seal like you really mean it—I go over my pinches a couple of times to make sure there aren’t any gaps. We don’t want any precious cheese oozing out! Then roll the edges up and over the pie and pinch and flatten all over again. Generously brush the pastry with the beaten egg, making sure you get the edges, too. Poke the top of the pastry, save for the edges, all over with a fork—you can’t have too many pokes.
Bake the pie until crisp and golden brown and the bottom is firm, 30 to 35 minutes.
Let cool a bit for the cheese to set before cutting into squares and serving.

Ready to turn your recipes into something memorable? Click here to get started!

Nonna Carmela’s Tiramisu – From ‘Mediterranea’

Published on: August 28th/2025
Author: Recipe by Nonna Carmela; from Mediterranea by Anastasia Miari (Quadrille, £28), photography © Marco ArgÜello
Recipe origin: Italy

Note from Anastasia: The dessert to beat all desserts, tiramisu needs little introduction. It has always been my favourite sweet ending to a meal, but when I moved to Sicily a few years ago to learn Italian and realised that tiramisù quite literally means ‘pick me up’, I fell in love with this dolce all over again.

Carmela’s tiramisù is light and creamy. It’s less saccharine than others I’ve tasted across Italy and strikes just the right balance between creamy, sweet and kicky (from the coffee). It’s also damn easy to whip up. Don’t think about adding alcohol to this one. It isn’t traditional tiramisù etiquette and Nonna Carmela would be very upset. She also advises you make it the day before to ensure a tidier slice. She served hers right after her Pasta alla Norma.

5 cups water
4 large eggs, separated
150 g (51/2 oz/scant 2/3 cup) caster (superfine) sugar
500 g (1 lb 2 oz) mascarpone, at room temperature
800 ml (27 fl oz/ 31/3 cups) brewed espresso (Carmela used 4 coffee pods), cooled
400 g (14 oz) sponge fingers (savoiardi/ ladyfingers; ideally thin ones)
2 tablespoons cocoa (unsweetened) powder

Using a hand mixer, whisk the egg whites in a large, clean bowl until soft peaks form. Be careful not to overmix them.

Put the egg yolks into a large bowl, add the sugar and whisk until pale and thickened.

Gradually add the mascarpone to the yolk and sugar mixture, whisking until combined. Add the egg whites and whisk again briefly until combined.

Now make the first layer of sponge fingers. Pour the coffee into a large Tupperware box or small baking dish. Place the dish you will use for your tiramisu next to the dish of coffee – Carmela used a 39 x 17 cm (15 x 7 inch) glass dish, but use any medium-sized deep dish you have. One at a time, dip half the sponge fingers into the dish of cooled coffee very quickly. Make sure this action is in and out in a flash – just as long as it takes to submerge the finger. They should not be soggy at all. Once you’ve submerged one finger, place it into the tiramisu dish immediately and then repeat the process until half the sponge fingers have been dipped and arranged.

Next, spread half the mascarpone mixture onto the sponger fingers. Now repeat the process with the sponge fingers to create another layer of soaked sponge fingers on top of the mascarpone layer. Finally, add the remaining mascarpone mixture and smooth out the top.

Place the dish in the refrigerator and chill overnight.

Before serving add a thick dusting of sifted cocoa.

Ready to turn your recipes into something memorable? Click here to get started!

60 queries in 0.216 seconds.